
How to Test a Product Concept Before Investing in Tooling
Cutting steel for a mould is the moment a hardware idea stops being cheap to change. Before that point, a wrong decision costs you a few days and a few thousand rupees. After it, the same mistake can cost months and lakhs. Yet many founders and R&D teams commit to tooling because the CAD model looks right and the team feels confident. Confidence is not evidence. If you want to test a product concept before tooling, you need a clear process that proves three things: people want the product, it works as intended, and it can be made at your target cost. This guide gives you that process in 7 steps. It is written for founders and R&D teams who want to reduce risk, control tooling cost and reach production with fewer surprises. Why Testing Before Tooling Matters Tooling is the largest one-time cost in most plastic and metal products. A simple single-cavity injection mould can start in the range of a few lakh rupees, while complex or multi-cavity tools can run well beyond that. Exact prices depend on part size, material, surface finish, cavity count and the toolmaker, so always get written quotes. The point is not the exact figure. The point is that tooling is expensive and hard to reverse. When a problem shows up after tooling, you usually have three bad options: modify the tool, scrap it, or ship a weaker product. Modifying steel is possible, but adding material is much harder than removing it, so some design changes force a new tool. Here are the problems that testing before tooling commonly catches: The table below shows why the timing matters. The multipliers are illustrative, based on the widely used engineering rule that change gets more expensive at every stage. They are not measured data, so treat them as a guide to the pattern. Stage when the change is found Illustrative relative cost of change What it usually means Concept and sketch 1x Edit a drawing or a render Prototype testing About 5x Reprint, remachine or rewire a prototype After tooling About 25x to 100x Rework or rebuild the tool, delay the launch After market launch 100x or more Recalls, returns, lost reviews and lost trust The lesson is simple. Spend a little earlier to avoid spending a lot later. What Concept Testing Actually Means Concept testing is a set of low-cost experiments that answer three questions before you commit to production tooling: It is different from production validation. Concept testing happens early, with rough prototypes and fast feedback. Production validation happens later, with tooled parts, to confirm that every unit meets spec. Step 1: Define What You Need to Prove Start with assumptions, not prototypes. Write down everything that must be true for the product to succeed, then turn each item into a testable statement with a pass or fail number. Agree on these criteria before you test. Teams that set the bar after seeing results tend to talk themselves into a pass. A written product design specification is the best home for these criteria, because it links every test to a requirement. Step 2: Validate Demand and User Need Before you build anything physical, check whether the problem is worth solving. Use fast, cheap methods: Look for strong signals such as deposits, repeat questions about delivery dates, or users describing a pain you did not mention. Polite interest from friends and family is not a signal. If people will not commit even a small amount of time or money, pause before you build. Step 3: Build the Right Prototype for Each Question A common mistake is building one expensive, perfect prototype to test everything. A better approach is to build several cheap prototypes, each designed to answer one question. Choose the method that matches the question and your budget. The chart below compares the most common options. Costs and lead times are indicative ranges for India and will vary by city, vendor and part size. Method Best for Indicative cost per part Typical lead time Main limitation FDM 3D printing Early shape and fit checks Low 1 to 2 days Rough surface, limited strength SLA or resin printing Fine detail, smooth finish Low to medium 2 to 3 days Brittle, may differ from final material CNC machining Strong, accurate parts in real material Medium to high 3 to 7 days Costly for complex shapes Vacuum casting 10 to 30 near-production copies Medium 5 to 10 days Master pattern needed, limited batch Dev boards and breadboards Electronics and firmware logic Low 1 to 3 days Not representative of final PCB behaviour If your product has electronics, test the circuit on a dev board first, then move to a custom board once the logic is stable. For enclosures, start with FDM, move to SLA for finish, and use CNC or vacuum casting only when you need production-like material behaviour. Step 4: Run Functional and Performance Tests Now test the prototype against the pass or fail criteria from Step 1. Keep tests simple, repeatable and written down. Keep a simple test log with the date, prototype version, test method, result and a photo. This log becomes proof for investors, certification bodies and your own team. It also shows which design change fixed which problem. Step 5: Test Usability and Ergonomics A product can pass every technical test and still fail in the hand. Run task-based sessions with 5 to 8 real users from your target group. Give each person a realistic task, stay quiet and observe. Watch for these signs: Human-centred design standard ISO 9241-210 recommends involving users early and iterating, which is exactly what this step does. After each round, decide what to change and what to freeze. Changing everything at once makes it impossible to know what worked. Step 6: Check Manufacturability Early A design that works as a 3D print may be hard or costly to mould or machine. A design for manufacturing (DFM) review before tool design catches this. Ask your toolmaker or
From Sketch to Shelf
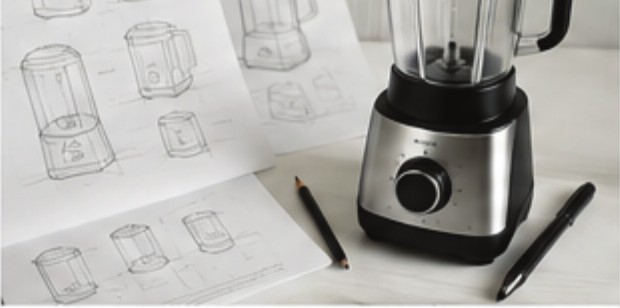
From sketch to shelf — the Studio iD process for turning an idea into a shippable product, from first concept drawings through prototyping, DFM and manufacturing.